
Apache Spark is the popular distributed computation environment. It is written in Scala, however you can also interface it from Python. For those who want to learn Spark with Python (including students of these BigData classes), here’s an intro to the simplest possible setup.
To experiment with Spark and Python (PySpark or Jupyter), you need to install both. Here is how to get such an environment on your laptop, and some possible troubleshooting you might need to get through. Obviously, will run Spark in a local standalone mode, so you will not be able to run Spark jobs in distributed environment.
My suggestion is for the quickest install is to get a Docker image with everything (Spark, Python, Jupyter) preinstalled. Having tried various preloaded Dockerhub images, I started liking this one: jupyter pyspark/notebook.
The summary below is hopefully everything you need to get started with this image. However if this is not sufficient, then the Docker image documentation here or else read this useful third party usage commentary by Max Melnick. Max describes Jupyter and Docker in greater detail, and that page will be very useful and recommended if you have not used much Docker/Jupyter before. I will not repeat this here but instead focus on understanding and testing various ways to access and use the stack, assuming that the reader has the basic Docker/Jupyter background.
Also do check my consulting & training page. You will be using this Spark and Python setup if you are part of my Big Data classes.
Installing and running Spark & connecting with Jupyter
After downloading the image with docker pull, this is how you start it on Windows 10:
docker run -p 8888:8888 -p 4040:4040 -v D:\sparkMounted:/home/jovyan/work --name spark jupyter/pyspark-notebook
Replace ” D:\sparkMounted” with your local working directory. This directory will be accessed by the container, that’s what option -v is for. The directory might be empty, you will need to put some files later. The -p option is for ports you will need mapped.
As you’ll note in the logs, the Jupyter container is being started inside the image. Copy and paste the Jupyter notebook token handle to your local browser, replacing the host address with ‘localhost‘. You are now in the Jupyter session, which is inside the docker container so you can access the Spark there.
Note: you can also run the container in the detached mode (-d). Then you don’t see the logs. If that is the case, then direct the browser http://localhost:8888 . It will ask for the notebook token. You will find it by typing: docker logs spark. There you will find the token. Provide that token.
You’re set.
Troubleshooting
Now, some errors you are likely to experience. If you see no errors, skip this section. First, a typical situation after restarting the container:
docker: Error response from daemon: Conflict. The container name "/spark" is already in use by container "f8004cfa18468ad63c7ef26a1a61a446e8367ef32ee69de3d8b6073ef251af73". You have to remove (or rename) that container to be able to reuse that name.
This can be fixed simply by removing the stopped container: docker rm [your-container-handle-here]
Another possible situation
jupyter/pyspark-notebook create notebook failed permission denied windows
In my case, the directory was read only. Upper directory was read only (windows). Modifying these permissions still did not yield result, the error persisted. I later guessed that this could have been caused by the filesystem type (exFAT). So I moved the local directory to another local drive, formatted with NTFS. Note that NTFS is native to Windows and generally better integrated with this operating system. The error disappeared but instead I got something even more obscure:
docker: Error response from daemon: Drive sharing seems blocked by a firewall.See 'docker run --help'.
Long story short, this disappeared only after I restarted file and printer sharing in Windows. I unchecked and checked again File and Printer Sharing for Microsoft Networks property. Uninstalled and Installed the property. Then the command did run properly and the Juyter notebook started properly inside the container. Here is one other docker run error that I happen to see once in a while:
C:\sparkMounted>docker run -d -p 8888:8888 (...)docker: Error response from daemon: driver failed programming external connectivity on endpoint spark (...): Error starting userland proxy: mkdir /port/tcp:0.0.0.0:8888:tcp:172.17.0.2:8888: input/output error.
This happens after Windows shutdown. The solution: Docker needs to be restarted.
Verifying the installation
Now you want to make sure that you can access both PySpark as well as Jupyter, and that both can talk to the running Spark daemon. In the Jupyter notebook, open a new cell and let’s try some basic Spark operations:
from pyspark import SparkContext
 sc = SparkContext("local", "first app")
words = sc.parallelize (
    ["This", "SPARK", "cluster", "seems", "to", "work", "just", "fine!"]
 )
 def f(x): print(x)
 fore = words.foreach(f)
Foreach() executed in parallel does not reach your Jupyter output, but you should see the expected output in the docker console. This proves Spark has created the RDD and executed the print function on it.
passing input and output data to Spark inside Docker
To process something more meaningful, you want to pass input data to your Spark install and receive some output programmatically. Because Spark runs inside the container, this is where your working directory becomes useful, because this is the directory that can be accessed, read and write, from both inside and outside teh container.
For instance, let’s examine this text file from Project Gutenberg, containing the text of Franz Kafka’s Trial. We will use Spark to find how many lines contain ‘K.’ (the main character name of the novel) and how many lines contain the word ‘trial’. Download the file and place it in the work directory as trial.txt. The file has 0,5 MB. Then paste and execute this mini counter app in a Jupyter cell:
bookFile = "file:///home/jovyan/work/trial.txt"
 bookData = sc.textFile(bookFile).cache()
 numKs = bookData.filter(lambda s: 'K.' in s).count()
 numTs = bookData.filter(lambda s: 'trial' in s).count()
 print("Lines with K: %i, lines with trial: %i" % (numKs, numTs))
Did you get 1135 and 108 as the result? What just happened is this: Spark accessed the file, created an RDD out of it, run filter transformation and delivered the output to your Jupyter console. You learned to provide input data as textfile, and recover the output programmatically. To ensure the numbers are correct, let’s confirm this locally:
$ more trial.txt |grep 'K.'|wc
   1158   15124   82210
$ more trial.txt |grep 'trial'|wc
    108    1427    7759
Nice! Spark can count.
Accessing PySpark inside the container
PySpark is Spark’s commandline tool to submit jobs, which you should learn to use. Let’s try to run PySpark. To run a command inside a container, you’d normally use docker command docker exec. So…
> docker container ls
CONTAINER
7e7896d430f6
> docker exec -i -t 7e7896d430f6 pyspark
OCI runtime exec failed: exec failed: container_linux.go:344: starting container process caused "exec: \"/bin/pyspark\": stat /bin/pyspark: no such file or directory": unknown
Oups. We’ve run into trouble because we don’t know the path to PySpark inside the container. But we can log into the container using regular bash shell and find out where lives PySpark: >docker exec -i -t 7e7896d430f6 /bin/bash
$ pwd
/home/jovyan
$ find / -name pyspark
...
/usr/local/spark-2.4.1-bin-hadoop2.7/bin/pyspark
You will see that this directory is also conveniently linked from /usr/local/spark . So, to start PySpark session, we should type:
docker exec -i -t 7e7896d430f6 /usr/local/spark/bin/pyspark

 Welcome to
      ____              __
     / __/__  ___ _____/ /__
    _\ \/ _ \/ _ `/ __/  '_/
   /__ / .__/\_,_/_/ /_/\_\   version 2.4.1
      /_/
Using Python version 3.7.3 (default, Mar 27 2019 23:01:00)
SparkSession available as 'spark'.
>>>
Submitting jobs with spark-submit
The last thing we want to do is to directly execute jobs inside our container at the OS level. Let’scopy this slightly modified mini counter app source code below, and save it as file called countKT.py in the working directory:
from pyspark import SparkContext
 logFile = "file:///home/jovyan/work/trial.txt"
 sc = SparkContext("local", "first app")
 logData = sc.textFile(logFile).cache()
 numKs = logData.filter(lambda s: 'K.' in s).count()
 numTs = logData.filter(lambda s: 'trial' in s).count()
 print("Lines with K: %i, lines with trial: %i" % (numKs, numTs))
Now let’s try to run a standalone Spark job inside the container:
>>docker exec -i -t 7e7896d430f6 /usr/local/spark/bin/spark-submit /home/jovyan/work/countKT.py
… and you should see this in the stdout stream…...19/05/16 08:55:31 INFO DAGScheduler: Job 1 finished: count at /home/jovyan/work/countKT.py:6, took 0.195248 sLines with K: 1135, lines with trial: 108...
Success!
Accessing the Spark WebUI
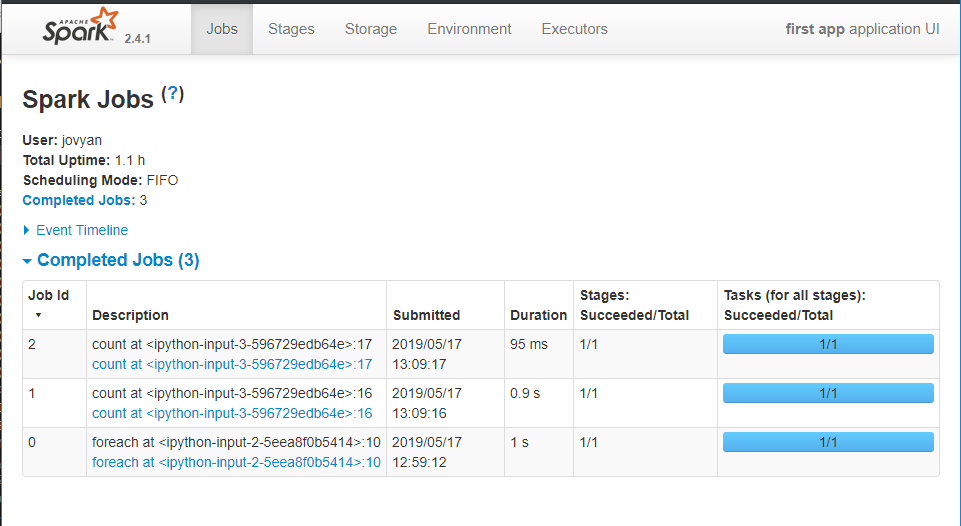
Spark also has a nice Web interface, sometimes very useful. To access the Web UI of your jobs, simply point your browser to http://localhost:4040 . You should be able to see the Spark Jobs listing.
Summary
We have installed Apache Spark inside the Docker container, which also contains Python and Jupyter Notebook installation. We have tested that Spark works inside the container. We learned to access it in three ways: from Jupyter notebook, from PySpark console, and using spark-submit jobs. We also learned to provide input data and receive output to/from Spark jobs in two ways: as files in the working directory, or programmatically in the Jupyter notebook. Finally, we have opened the basic monitoring and debugging channels: the Spark console standard error stream (with docker logs) and the WebUI.
We have not done anything meaningful in Spark yet, but we have installed it, tested the installation and learned to access it. Now we can move to something more interesting. For instance, the setup you’ve just installed and tested is used in my Data Engineering for Data Scientist class, where we use Spark to train and deploy the Machine Learning models.
Hopefully this page has been useful to some people. With any questions or enquiries, do contact me and I’ll respond with pleasure.
Great article!
However for some reasons I can’t make the spark-submit works anymore except if I add this at the beginning of each script. Any suggestion to avoid that?
import sys
sys.path[:0] = [‘/usr/local/spark/python’, ‘/usr/local/spark/python/lib/py4j-0.10.9-src.zip’]
Note, one of the solution I thought about was to put everything in a dockerfile like this:
FROM jupyter/pyspark-notebook:latest
ENV PYTHONPATH=’/usr/local/spark/python:/usr/local/spark/python/lib/py4j-0.10.9-src.zip’
but now I’m getting
WARN NativeCodeLoader: Unable to load native-hadoop library for your platform… using builtin-java classes where applicable
Exception in thread “main” java.io.IOException: Cannot run program “/usr/local/spark/python”: error=13, Permission denied
Please, if you have a suggestion don’t hesitate to reach
Jonas